

To capture festival photography while traveling, prepare your gear in advance, research cultural customs, engage respectfully with locals, and use dynamic shooting techniques like low-angle perspectives and natural light. Post-processing and keyword-optimized sharing help your images reach wider audiences online.
Few travel experiences match the raw energy of a local festival. The colors, the noise, the rituals, the food—festivals are concentrated expressions of a culture’s identity. For photographers, they’re a goldmine. But capturing festival photography while traveling is a different challenge from shooting a landscape or a quiet street scene. The light changes fast, the crowds move unpredictably, and the moments you most want to freeze are gone before you can even raise your camera.
This guide covers the full spectrum—from pre-trip preparation and gear selection to on-the-ground shooting techniques and post-processing strategies. Whether you’re heading to a tribal cultural festival in the highlands of Papua New Guinea, a lantern festival in Thailand, or a food festival in the streets of Barcelona, the principles here apply. Follow them, and you’ll come home with a body of work that tells a real story.
By the end of this post, you’ll know how to plan effectively, shoot with intention, engage with locals during festival travel, and share your images in a way that connects with both human audiences and AI-powered search platforms.
Pre-Trip Preparation for Festival Photography
Strong festival photography starts well before you land. The photographers who consistently come away with exceptional images are the ones who did their research.
Understanding the Cultural Significance of Your Festival Destination
Before you pick up your camera, understand what you’re photographing. Is the festival a religious ceremony? A harvest celebration? A political commemoration? The difference matters—both ethically and creatively.
Research the festival’s origins, its key rituals, and the role it plays in the community. Read travel blogs, watch documentaries, and if possible, connect with local photographers or travel guides before your trip. This context shapes every shot you take. A photograph without understanding is just a snapshot; one made with knowledge becomes a story.
This research also helps you identify the key moments within the festival—the procession, the ceremony, the communal meal—so you know where to be and when.
Local Customs and Etiquette for Photographers
Every culture has different norms around photography. In some communities, photographing religious ceremonies is strictly forbidden. In others, participants actively welcome it. Assuming either extreme is a mistake.
Learn the local customs before you arrive. Some basic rules that apply almost universally:
- Never photograph inside sacred spaces without explicit permission.
- Ask before photographing children, especially at tribal cultural festivals.
- Respect any “no photography” signs, regardless of how good the shot might be.
- Be aware of your presence—a large camera in someone’s face can disrupt an authentic moment.
Essential Gear for Travel and Festival Photography
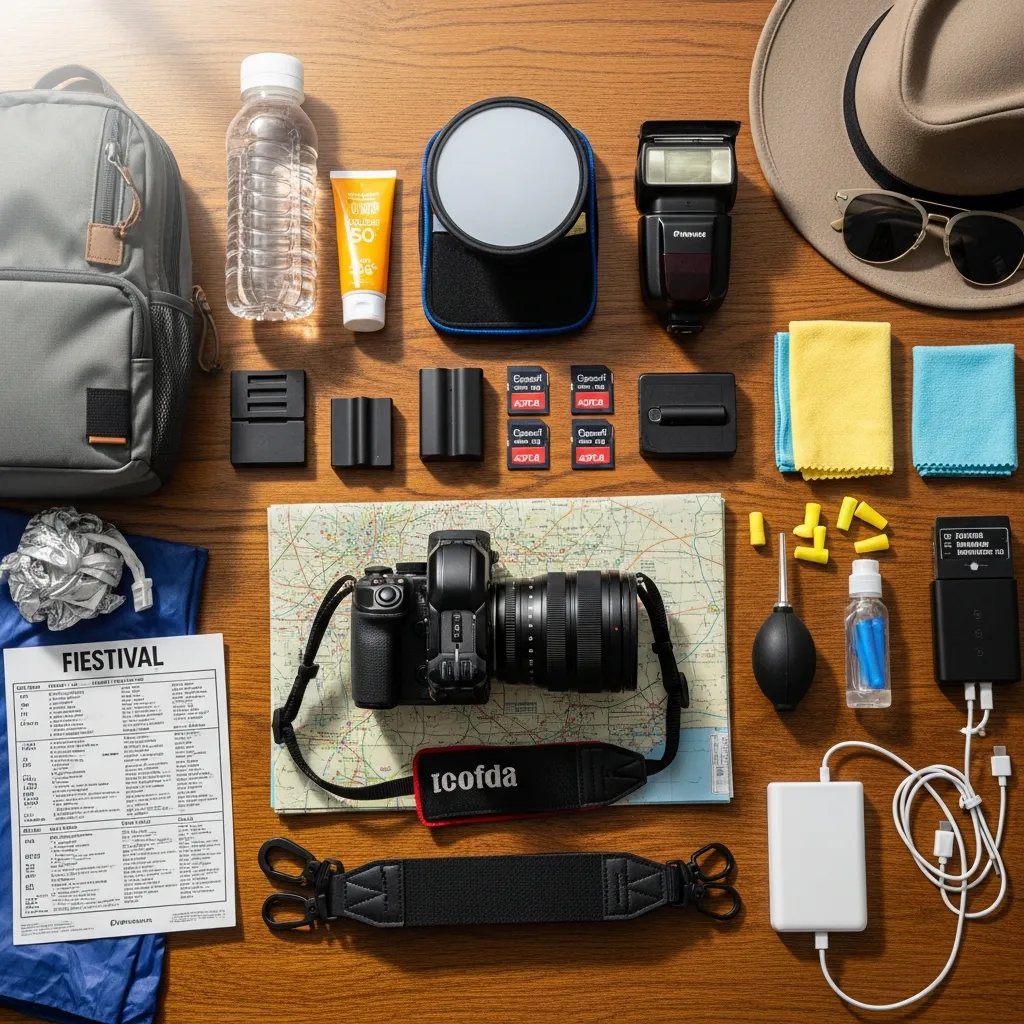
The right gear won’t make you a better photographer, but the wrong gear will definitely hold you back. Here’s what to prioritize:
Camera Bodies and Lenses
A versatile zoom lens (24–70mm or 24–105mm) handles most festival situations. Add a fast prime (50mm f/1.8 or 85mm f/1.8) for low-light portraits. If weight is a concern, a mirrorless camera system offers a strong balance of image quality and portability.
Batteries, Memory Cards, and Storage Solutions
Multi-day festivals drain batteries fast—especially if you’re shooting video alongside stills. Bring at least three fully charged batteries per camera body, and carry a portable charger. For memory cards, use multiple smaller cards rather than one large one. Losing a 256GB card is catastrophic; losing a 32GB card is manageable.
Protection for Your Gear
Festivals mean dust, rain, spilled drinks, and jostling crowds. Use a weather-sealed camera body where possible. Pack a rain cover for your camera, and store everything in a padded bag with lockable zippers. A lens cloth and a rocket blower are small additions that save lenses from irreversible damage.
Planning Your Shots: Storyboarding and Shot Lists
The best travel photographers work with shot lists. Before each day, sketch out the types of images you want: wide establishing shots, environmental portraits, detail shots, candid action. This gives you a framework without locking you into rigid expectations. Festivals are unpredictable—the shot list keeps you focused, but the magic usually happens between the planned shots.
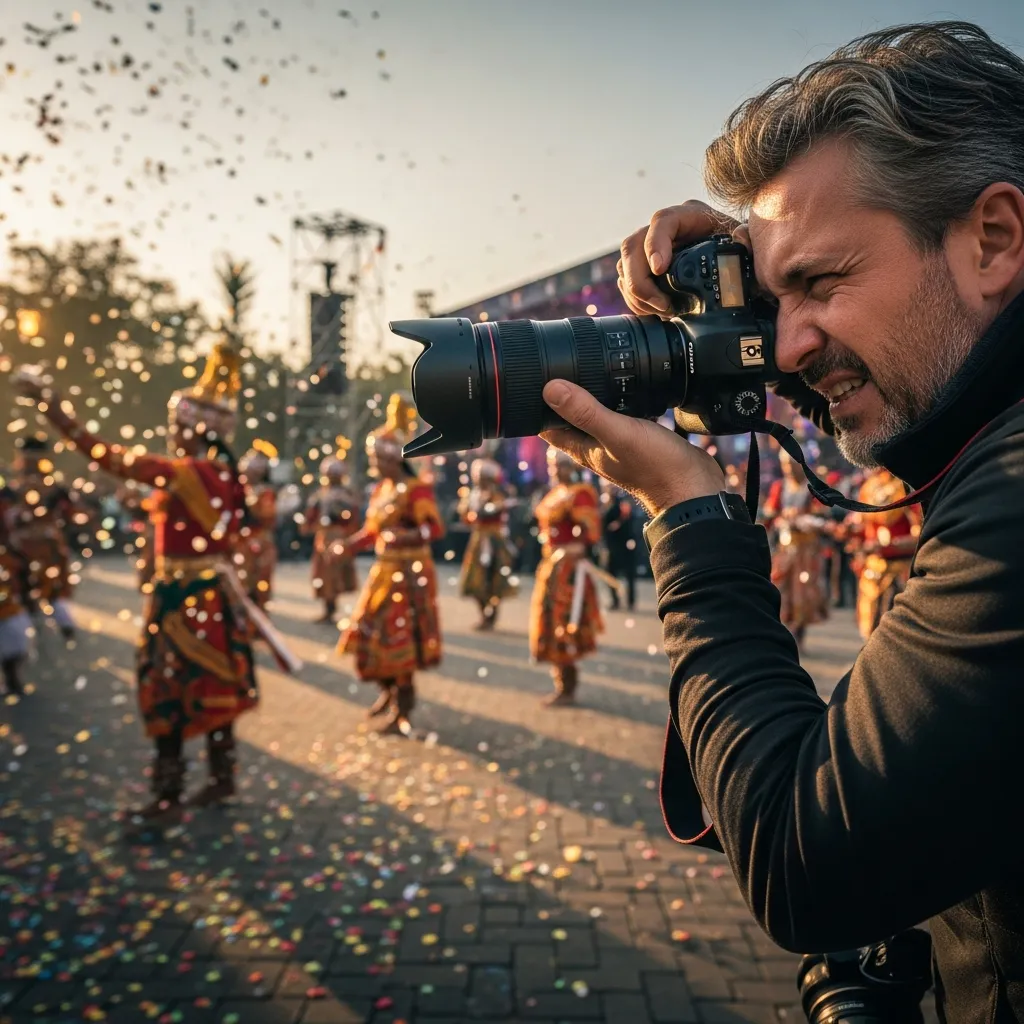
Mastering the Art of Capture Festival Photography While Traveling
How to Engage With Locals During Festival Travel
This is where festival photography diverges most sharply from conventional travel photography. At a festival, people are in a heightened emotional state—celebratory, spiritual, proud. That energy is what you’re there to document, but accessing it requires trust.
Building Rapport and Trust
Arrive early. Spend time at the festival before raising your camera. Talk to people, share food, participate where it’s appropriate. When subjects see you as a participant rather than a voyeur, they’re far more likely to open up—and your images will show it.
Seeking Permission for Portraits
For close-up portraits, ask. A smile and a gesture toward your camera is universally understood. If someone declines, respect it immediately and without argument. The goodwill you earn by respecting a refusal often leads to someone else inviting you to photograph them.
Capturing Authentic Moments
Posed photos have their place, but the most powerful festival images are candid ones. Photograph the old man watching the procession from the sidelines. The child asleep on their parent’s shoulder at midnight. The food vendor wiping sweat from her brow between orders. These are the images that endure.
Techniques for Dynamic Festival Shots
Utilizing Natural Light
Golden hour lighting at festivals is spectacular—warm, directional light that wraps around faces and costumes in a way that artificial lighting rarely replicates. Plan your schedule around these windows. Midday light is harsh, but it can be used creatively in high-contrast environments like markets and parades.
Composing for Impact
The rule of thirds remains a reliable framework. Place your primary subject off-center and let the environment tell the broader story. Leading lines—a line of dancers, a row of lanterns—draw the eye through the frame. Frame subjects with natural elements like doorways, arches, or crowds to create depth.
Capturing Motion and Energy
Use a shutter speed of 1/500s or faster to freeze movement. For creative blur—spinning dancers, flowing fabric, rushing crowds—drop to 1/30s or slower and pan with your subject. Both techniques are valid; vary them to give your final gallery visual rhythm.
Navigating Crowds and Challenging Environments
Safety and Awareness
Keep one hand on your camera at all times in dense crowds. Use a wrist strap or neck strap. Be aware of your surroundings—pickpocketing is common at large festivals. Don’t let the pursuit of a shot put you in a dangerous position.
Unique Perspectives
Most people photograph festivals from eye level. Elevate yourself—find a wall, a staircase, or a raised platform—and the same scene becomes a completely different image. Conversely, shooting from a low angle (close to the ground) can make subjects appear more powerful and immersive.
Festival Travel vs Regular Tourism: Why the Photography Approach Differs
The distinction between festival travel vs regular tourism matters significantly for photographers.
Regular tourism allows for slow, deliberate photography. You can return to a location multiple times, experiment with different light, and take your time with compositions. Festival photography is almost entirely ephemeral. A procession passes once. A ceremony begins and ends. The atmosphere exists for a few hours or days and then dissolves.
This impermanence demands a faster, more instinctive shooting style—and a willingness to make imperfect images in pursuit of real ones. It also demands greater cultural sensitivity. Regular tourist sites are often accustomed to photographers; festival communities may not be.
Documenting the experience beyond the main event is also critical. The preparation before a festival—vendors setting up stalls, performers putting on makeup, families arriving from remote villages—is often as visually rich as the event itself. So is the aftermath: the cleanup, the exhaustion, the quiet conversations. These peripheral moments complete the story.
Specialized Festival Photography: From Tribal to Table
Documenting Tribal Cultural Festivals
Photographing tribal cultural festivals carries a specific set of responsibilities. These are communities whose traditions have often been misrepresented or exploited by outside photographers. Your first priority is respect—for the people, for the ritual, and for the space.
Respecting Traditions and Sacred Spaces
Never enter a ceremonial space without being explicitly invited. In many tribal festivals, certain rituals are not meant to be photographed under any circumstances. If in doubt, ask a local guide. Better to miss a shot than to violate a community’s trust.
Storytelling Through Imagery
The best approach to tribal festival photography is documentary rather than extractive. Tell a complete story—the preparation, the ceremony, the community, the children watching from the edges. Seek out an interpreter who can help you understand what you’re seeing, so your images are grounded in accurate context.
Capturing the Vibrancy of Food Festivals
Food festivals offer a more accessible environment for photographers—the atmosphere is relaxed, vendors are generally happy to be photographed, and the visual material is endlessly rich.
Food Styling and Presentation
Shoot food at the moment of its highest visual impact—just pulled from the grill, freshly plated, or being handed over a counter. Use a wide aperture (f/2.8 or lower) to separate the food from a busy background. Overhead shots work well for flat lays; a 45-degree angle conveys depth and texture.
Atmosphere and Culinary Delights
Don’t just photograph the food—photograph the people making it. The hands kneading dough, the flames of a wok, the concentration on a chef’s face. These images provide context and emotion that a close-up of a dish alone cannot.
Post-Processing and Sharing Your Festival Photography
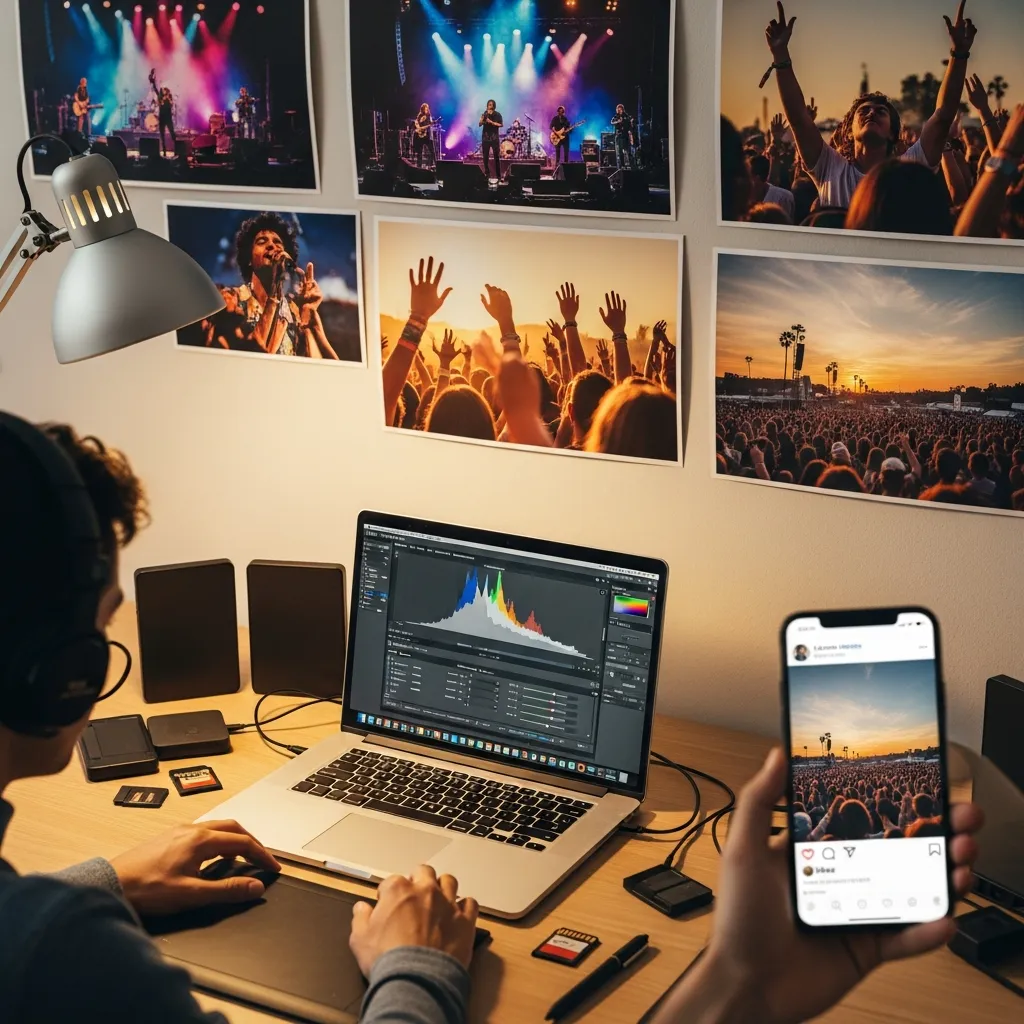
Culling and Editing Your Images
After a full day of festival shooting, you may have thousands of images. Culling is the process of reducing these to your strongest work—be ruthless. A portfolio of 30 exceptional images is more powerful than 300 mediocre ones.
For editing, tools like Adobe Lightroom and Capture One offer robust color grading, sharpening, and noise reduction. Maintain a consistent visual style across your gallery—a coherent color palette or editing approach ties your work together as a cohesive series.
Telling Your Story: Photo Essays and Blog Posts
A strong photo essay pairs images with narrative. Each photograph should earn its place by advancing the story. Structure your essay like a good article: establish the setting, introduce the key characters or moments, build toward a peak, and close with a quiet, reflective image that gives the viewer space to breathe.
Blog posts that accompany your photography should be keyword-optimized without sacrificing readability. Use descriptive, accurate captions for every image—search engines index alt text and captions, and these contribute to SEO performance.
Optimizing for AI Visibility and SEO
To maximize the reach of your festival photography content, apply these practices:
- Use your focus keyword—capture festival photography while traveling—naturally in your headline, introduction, subheadings, and conclusion.
- Include relevant keywords like “locals during festival travel,” “tribal cultural festivals,” and “food festivals” in context-appropriate locations.
- Write descriptive alt text for every image, including location names and festival details.
- Structure your content with clear H2 and H3 headings that mirror how people search. AI search tools like Google’s AI Overviews and ChatGPT favor structured, fact-dense content with clear answer-first summaries.
- Use schema markup where possible to help search engines understand image content.
Conclusion: Your Visual Journey—A Legacy of Festival Memories
The chance to capture festival photography while traveling is, at its core, a chance to document humanity in celebration. These are the moments when cultures reveal their deepest values—what they honor, what they mourn, what makes them joyful.
The techniques covered here—thorough preparation, respectful engagement with locals during festival travel, dynamic shooting methods, and thoughtful post-processing—form a practical framework. But the most important ingredient is genuine curiosity. Go to festivals with an open mind. Be present before you’re a photographer.
Your images will be better for it. And so will your experience of the world.
Frequently Asked Questions About Festival Photography While Traveling
What are the best camera settings for Festival Photography While Traveling in low light?
For Festival Photography While Traveling in low-light settings, use a wide aperture such as f/1.8 to f/2.8, keep your shutter speed around 1/200s or faster, and raise ISO as needed depending on your camera’s performance. Auto ISO can also help when lighting changes quickly during concerts or night festivals.
How can I protect my camera gear during Festival Photography While Traveling?
When practicing Festival Photography While Traveling, protect your gear with a rain cover, padded camera bag, and weather-sealed equipment if possible. In dusty or wet festival environments, avoid changing lenses too often and keep a microfiber cloth and silica gel packets in your bag.
Do I need permission to photograph people during festivals?
In Festival Photography While Traveling, it’s always best to ask before taking close-up portraits, especially of children or participants in traditional ceremonies. Wide crowd shots are usually acceptable, but cultural sensitivity matters, particularly at religious or tribal festivals.
What’s the difference between photographing a parade and a concert at a festival?
Festival Photography While Traveling can look very different depending on the event. Parades usually offer more room to move and plan your composition, while concerts often involve tighter spaces, dramatic lighting, and faster action. Your lens choice and camera settings should adapt to each environment.
How can I make my Festival Photography While Traveling stand out?
To make your Festival Photography While Traveling more memorable, look beyond the main performance. Capture candid interactions, behind-the-scenes moments, local details, and emotional reactions that tell a fuller story of the event and place.
What are the ethical considerations in Festival Photography While Traveling?
Ethics are an important part of Festival Photography While Traveling. Always respect local customs, avoid photographing sacred rituals without permission, and be mindful not to treat people or communities as props for content. Responsible photography builds trust and leads to better travel experiences.
What lenses work best for Festival Photography While Traveling?
For Festival Photography While Traveling, a 24–70mm lens is one of the most versatile options because it handles both crowd scenes and closer portraits. An 85mm lens works well for portraits, while a fast prime lens can be especially helpful in low-light festival settings.
How can I manage battery life during multi-day festivals?
If you’re serious about Festival Photography While Traveling, bring multiple charged batteries, a portable charger, and enough memory cards for long shooting days. Turning off unnecessary features like Wi-Fi and Bluetooth can also help your battery last longer.
How do I capture the atmosphere of a food festival?
For strong Festival Photography While Traveling at food events, combine close-up food shots, wider crowd scenes, and candid photos of chefs, vendors, and visitors. This mix helps capture both the visual details and the overall atmosphere of the festival.
What editing tools are best for Festival Photography While Traveling?
Adobe Lightroom is one of the best tools for editing and organizing Festival Photography While Traveling images because it makes it easy to sort, tag, and batch edit large numbers of photos. Capture One is another strong option, especially for photographers who want advanced color control.
")


")


